Does your current cattle vaccination regime include a dewormer? If not, you may want to consider adding it. Pour-on topical dewormers, like Ivermectin, serve as an effective way to help control and manage internal and external parasites in your cattle.
Ivermectin is cost-effective and a little application goes a long ways in keeping your cattle healthy. Dosage is based on the weight of your animal(s). Using an applicator gun, this dewormer is easy to apply right in the chute, along with your other vaccinations.
We run all of our cattle through our cattle facility every fall for vaccinations, including Ivermectin. Applying a dewormer in the fall-time works best for our operation, as lice can often be a problem during the winter months. Our winters start early and last a good six months, at the minimum. Further, depending on how bad the flies are in the summer, we will often apply a broad spray application to the cattle right in the field, using a back-pack sprayer.
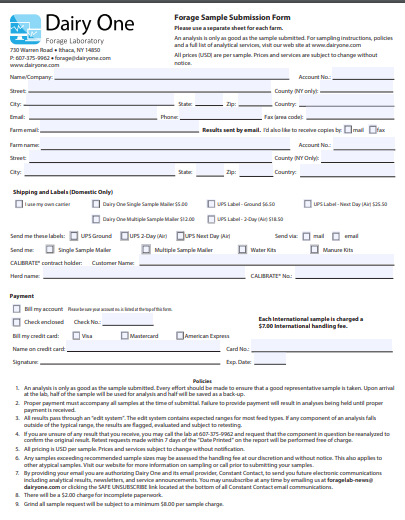
Today’s post will focus on the methodology of collecting a forage sample, the tools/supplies needed, and where you can send your forage sample for analysis.
Their website is extremely user-friendly, and their instructions for collecting a forage sample are thorough and easy to understand. Further, they even provide forage analysis kits and other supplies to help with the sample collection process.
Forage samples need to be submitted in a quart-sized plastic bag within a Dairy One Forage Analysis Laboratory mailer envelope. For our purposes, we will be discussing the methodology of collecting a HAY sample. Please see the guide for Collecting a Forage Sample, for all other forage types.
Steps for Collecting a Hay Sample
Hay Probe Tool
If you don’t already own one, you will need to purchase a Hay Probe tool. This tool will allow you to bore (or make a hole), through each hay bale. Using a hay probe to collect a core sample will allow for the most accurate nutritional breakdown of each of your particular sample lots. Also, the hay probes on the market today are extremely user-friendly and can be used to collect many samples, both efficiently and effectively by a single person.
Determining Different Sample Lots (if applicable)
Be sure to determine your sample lots.
Let’s say you purchased hay from two different hay producers, and their hay bales are from two different cuttings, a month apart:
We have Producer A, with cuts from July and August, each from a separate field, and we have Producer B, also with cuts from July and August in two different fields. That gives us 4 LOTS to sample.
Permanent marker to label each bag with Lot Name (e.g., Producer A – July Hay)
Use your hay probe to bore into each bale in the appropriate location (see here for instructions for square and round bales). Empty the hay probe’s cleanout rod into your clean bucket, and then move to your next bale, adding each sample to the same bucket as you go along. After completing each lot, you should have 1 bucket with all of your samples. Mix the samples by hand in the bucket and fill your sample bag with approximately 1 pound of material (the lab recommends 2-3 good handfuls). Squeeze out as much air as possible and seal the bag. Repeat this entire process for each of your lots, being sure to keep your samples labeled.
Place each labeled, quart-sized plastic zip lock bag sample into your Dairy One Forage Analysis Laboratory mailer, along with a completed submission form and place in the mail. The lab will test your samples based on the type of forage testing you select. We always select the Forage NIR testing, which is $18.00/sample. This analysis provides us with Crude Protein and Total Digestible Nutrition, as well as a wide plethora of other nutritional information on a Dry Matter and an As-Is basis. Results will be sent to the email that you provide on the submission form. You can also receive copies by fax or mail.
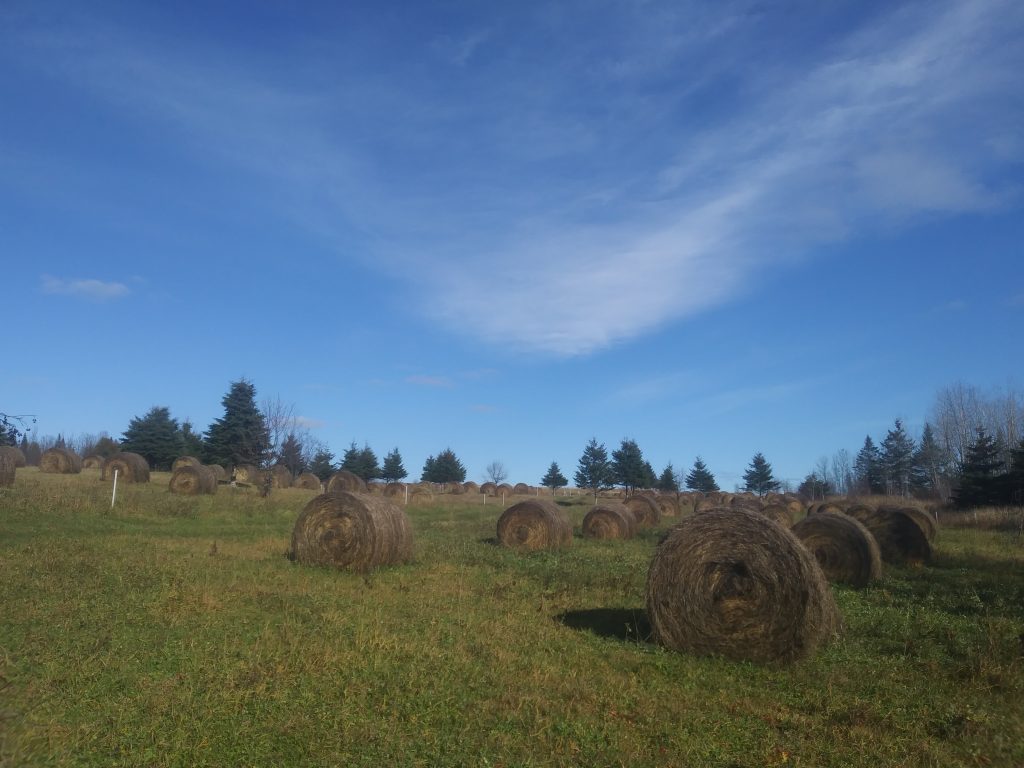
Forage costs are arguably the highest expense for any cattle operation, especially for those farmers whom feed-out hundreds of hay bales each winter. When you are budgeting for, and estimating your winter hay needs, it is important (nutritionally and financially) to know the actual quality of your hay. Each hay bale purchased is a small investment into your operation. You are putting forth money (and a lot of it for many of us) into forage/hay purchases and in turn, you hope that your forage/hay will provide the right rations of nutrition for your beef cattle. Ultimately, your “pay-off” will be represented by those same beef cattle thriving throughout the winter hay feeding season and then producing a healthy calf come calving time, and continuing to thrive and produce, year-after-year.
When I talk about a cow thriving and producing, I am thinking in terms of this: “thrive and produce” = a gestating cow that can maintain her body condition (as best as possible) during the winter, by consuming forage/hay that is a high-enough quality to allow for healthy fetus development of her calf, lactation production, and delivery of a healthy, strong calf. Then, post-calving, she needs to come into estrus/start cycling and be bred-back, all the while nursing her calf.AND for first-calf and second-calf heifers, we expect them to do all of this, PLUS continue to grow themselves. A tall order, indeed!
We expect a lot out of our beef cows, and therefore, we need to provide them with the quality of forage/hay/feed they need to thrive and produce.
Does quantity equal quality? No, it does not. You can have all the hay bales that you require according to your calculations (see here for calculating winter hay) but if the hay quality does not meet the nutritional demands of your animals, you very likely will need to feed out more forage/hay/feed supplement per day/per head than you initially calculated for.
And, what do we mean by the term “quality”?
Have you ever looked a bale of hay and wondered, “what really is in this hay?” “How nutritional is this hay? And how does my hay meet the nutritional demands of my animals?
We have only been in the beef cattle business and thus, dealing with hay, for six years. As such, we continue to learn and grow in regards to what we look for when buying hay. We have started to get a very small sense of the quality of our hay by sight and smell. Hay that has more of a “fresh-cut smell”, than a “musky, moldy smell.” We have had some bales with mold all the way through. Moldy hay will likely provide your cattle with little, if any, nutritional value, and more importantly, may not be safe to feed your your pregnant cows (moldy hay has been known to cause fungal abortions in pregnant cows). The more hay bales you look at, the more you can start to develop a visual basis, for which you can compare to bales from different producers/fields/times of year. We can look at two different hay bales, from either two different producers or the same producer but different fields and/or different cut, and visually see a difference in what we perceive is the quality of those bales. Then, we can discuss those differences until we are blue in the face. In the end, we could think we feel confident that we are feeding our mama cows hay with the right nutritional break-down but are we really????
What nutritional break-down are we looking for in a bale of hay?
Throughout this 3-part blog series, I will be referring to several nutritional terms:
Dry Matter (DM): Simply put, the term dry matter is the amount of hay, that when tested, is moisture-free. When a hay sample is tested, you will receive a forage analysis report, and one of the variables quantified, is the amount of moisture in the forage sample. Say that a particular sample of hay is 15% moisture and 85% dry matter. When making beef cow feed ration calculations, you need to use the dry matter composition. We will discuss this in more-depth later on in this series. I will refer to Dry Matter as DM.
Crude Protein (CP): Crude protein is another variable quantified in a forage/hay analysis. The percentage of crude protein tells us how much nitrogen is present in a given sample, representing both true protein and non-protein nitrogen. For example, a 1200-pound beef cow, in the pre-calving stage (60-90 days before calving) will require a diet of approximately 8.6% crude protein. (https://www.pubs.ext.vt.edu/400/400-012/400-012.html). This value will vary depending on the age of your cow (first-calf heifer versus mature cow, time of year, weather conditions, and where they are in the production cycle (pre-calving, postpartum, lactating (nursing a calf)and pregnant (bred-back after calving), and gestation (pregnancy stage after weaning calf, not lactating).This publication, by the Virginia Cooperative Extension, provides an extremely detailed and very useful guide for nutritional requirements (CP and TDN) for beef cows throughout the entire production cycle for mature cows, 1st-calf heifers, and more.) I will refer to Crude Protein as CP.
Total Digestible Nutrients (TDN): The TDN percentage in a forage analysis tells us all about energy: The total amount of the digestible protein, lipid, carbohydrates and fiber components present. Knowing the TDN percentage allows us to better decide if our forage is meeting the energy requirements of our cattle, and further, is a key component in determining and balancing winter forage rations. I will refer to Total Digestible Nutrients as TDN.
Continuing with our example from above (Crude Protein needs) of a 1200-pound beef cow, in the pre-calving stage (60-90 days before calving), this cow’s diet should be comprised of approximately 54.6% TDN. Our hypothetical, 1200-pound beef cow, in the pre-calving stage (60-90 days before calving) will require around 24.4lbs Dry Matter intake/day, with a nutritional break-down of approximately 8.6%/2.07lbs/day Crude Protein and 54.6%/13.2lbs/day Total Digestible Nutrients. (https://www.pubs.ext.vt.edu/400/400-012/400-012.html).
How we approach the management of our cattle herd is an ever-evolving work in progress, and there will never be a one-size-fits-all mold. What worked last winter may not work this winter and so forth. Thus, I think part of the draw and challenge for us is that there always is and always will be new things for us to learn. The all-important topic of Winter Hay/Forage/Feed Quality is always on our minds, no matter the time of year. On that note, I thank you for taking the time to read this post. Understanding the importance of – and how to test for – the quality of our cattle’s winter hay is critical in ensuring top performance and production of our beef cattle. I encourage you to please check out the rest of this 3-part series, as we post it. Thank you!
Are you struggling with infertility in your cow herd?
Is your herd susceptible to multiple pinkeye infections, despite a seemingly solid vaccination program?
Are you experiencing late-term abortions and/or stillbirths?
Are you noticing a decrease in coat quality in your herd?
Are you seeing a rapid decline in body condition in your cows, despite a solid feeding regime?
Let me ask you, “What kind of mineral program is your herd on?”
For many cattle farmers, deciding on the right mineral program and implementing that program can make all the difference for their herd health. In some regions, though, mineral deficiency is not a concern as soils are already sufficiently high in the minerals required for cattle. For those farmers, there may be no need to supplement with minerals. On the other hand, for farmers like us in Maine, mineral supplements really are required for maximum herd health. Our soils are terribly deficient in critical minerals like selenium and copper. Failing to recognize such a need for mineral supplements would be a costly risk to our herds’ health.
To be fair, mineral deficiency is not always the culprit of such heath issues as presented in the beginning of this post but evaluating your mineral program can provide you with important answers. Perhaps your struggle with infertility has nothing to do with minerals but instead with a bum bull? Or maybe minerals are one factor in a mutilfactorial heath issue. Either way, we can not stress enough the importance of a strong, consistent mineral program tailored to the specific needs of your animals and environment.
Mineral deficiency in cattle can pose significant health risks and often times, can produce results that are devastating and costly. An animal suffering from a mineral deficiency may suffer a wide spectrum of health issues such as but not limited to: reproductive failure (e.g., infertility, abortion, stillbirths, retained placenta) and/or immune suppression in which they can became highly susceptible to contracting diseases such as the dreaded pinkye or their immune system may be in such a weakened condition that their bodies can not properly utilize vital, disease-preventing vaccinations. Any one of these conditions can be devastating. Depending on the size of your herd and the condition of your finances, even one stillborn or aborted calf can have a costly impact on your operation. Other reproductive issues such as infertility can also be costly. No cattle owner wants to be feeding out hay all winter long only to find out come spring/summer that their cow or cows can’t get pregnant.
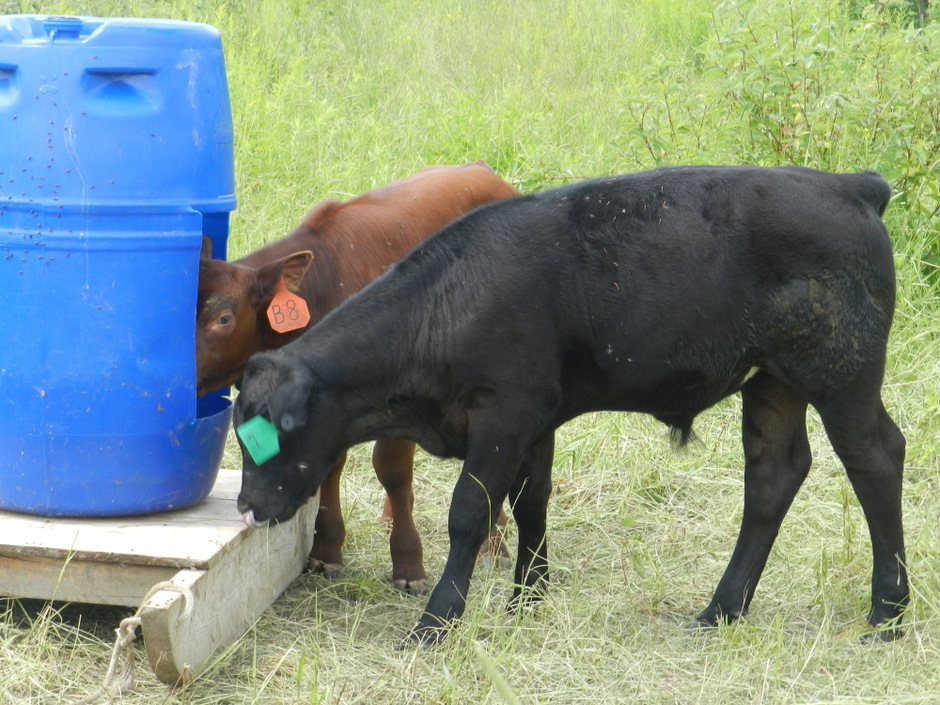
Calves getting their mineral fix.
As I mentioned earlier, a proper mineral program becomes even more critical in areas where soils are deficient in certain minerals. Here in Northern Maine, our soils are highly deficient in two critical minerals for cattle: selenium and copper.
To counter-balance such a deficiency, we have to provide our cows with a trace mineral high in selenium and copper; in addition, we need to make sure we are providing enough of these minerals on a daily basis for our herd size. We currently feed our herd loose Maine Grass Brood Cow trace mineral.
Understanding what is and what isn’t in the ground under your cattle’s hooves is important to consider in managing herd health.
Deciding on the Right Mineral Program
I strongly suggest that during the process of developing a mineral program, you consult with local farmers as well as your veterinarian. They can lend you solid, real-life insight into what kind and brand of minerals work and which don’t, as well as provide information on cost and supply.
Research the soils on your farm and determine what, if any, minerals are naturally low-occurring. An internet search can yield many useful maps, displaying levels of minerals such as selenium and copper throughout the United States for example. Check with your local soil and water conservation district office. A soil conservationist may be able to provide you with valuable information on the mineral content of your soils. Also consider checking with a local university about soil testing. Having your soil tested can give you insight into mineral contents as well as provide other interesting and important information on your soil.
After you you have done your research, it is time to hit the feed store and mills!
Buying Minerals
Local feed stores and mills can be great sources for buying cattle mineral. Be picky, though. Thoroughly check out the ingredients label for the right mixture of minerals for your needs. Also, this is not the time to be cheap. Don’t grab a cheap $10 bag of cattle mineral. It is worth it to pay a higher price for a higher quality product. You can scrimp and do cheap in other aspects of cattle farming but not with mineral. Mineral is an investment in your herd health.
Don’t be afraid to expand your mineral search beyond your local stores. Often times, feed stores and mills in other towns or even other counties will transport mineral to your area. You may be surprised to find that the farmer down the road gets his supply of mineral delivered to his farm from an out-of-town/county supplier. These suppliers expect you to buy in bulk, though, so be sure you have a place to store your mineral, protected from the elements. We buy our mineral this way, and we have been very pleased thus far with our supplier – Feed Commodities International.
Don’t be shy. Check with your vet and other farmers. See what they recommend for minerals and ask where they purchase them.
Feeding out Minerals
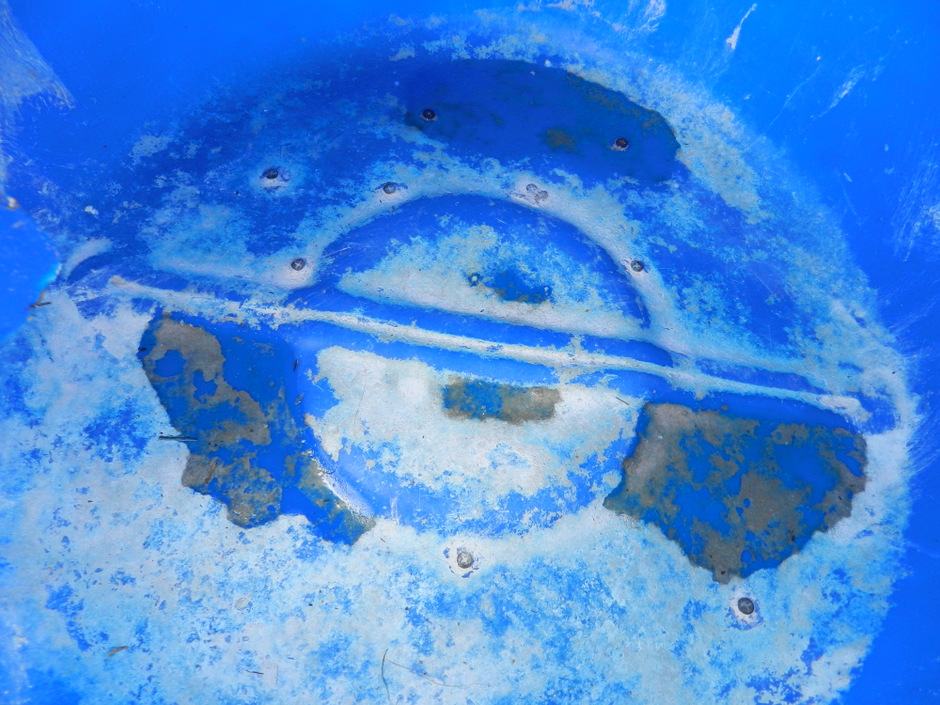
Once you have your mineral, you need to decide how much to feed out to your herd. In addition, you need to consider how you will provide the mineral. The mineral should be placed in a container, easy to access for each cow and protected from the elements. The mineral container itself should be sturdy and ideally, portable, so you can move it from pasture to pasture easily. Your animals will love their minerals and they can be very hard on equipment!
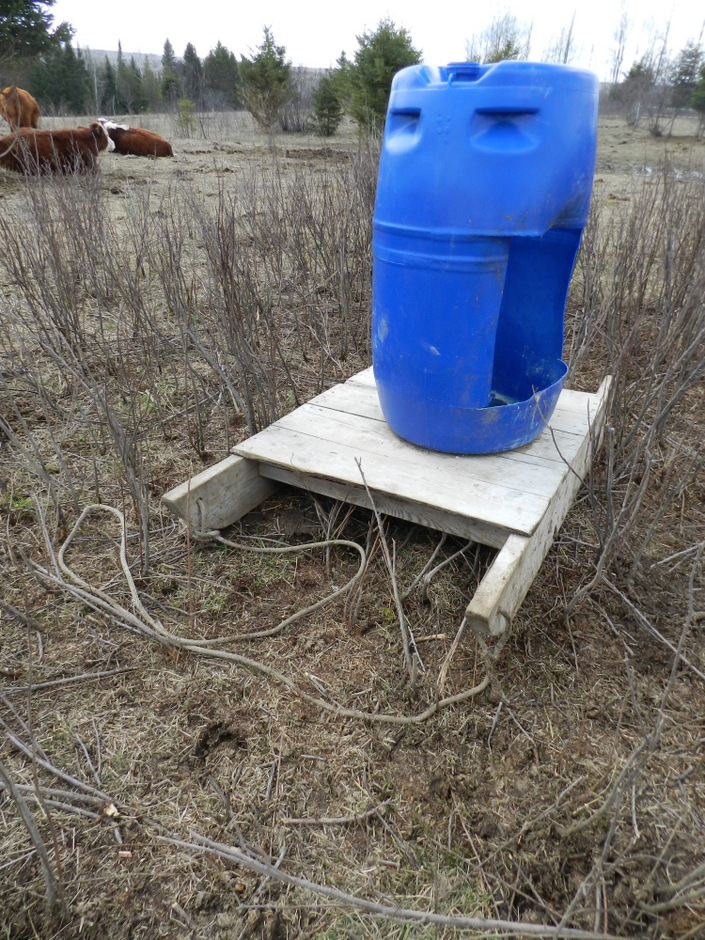
Our portable mineral container
We went through a couple different versions of a mineral container system until we found the one that worked best.
As you can see in the picture, our mineral container is built from a plastic barrel, with an appropriately-sized opening for our cattle to access the mineral.
Another view of our portable mineral container
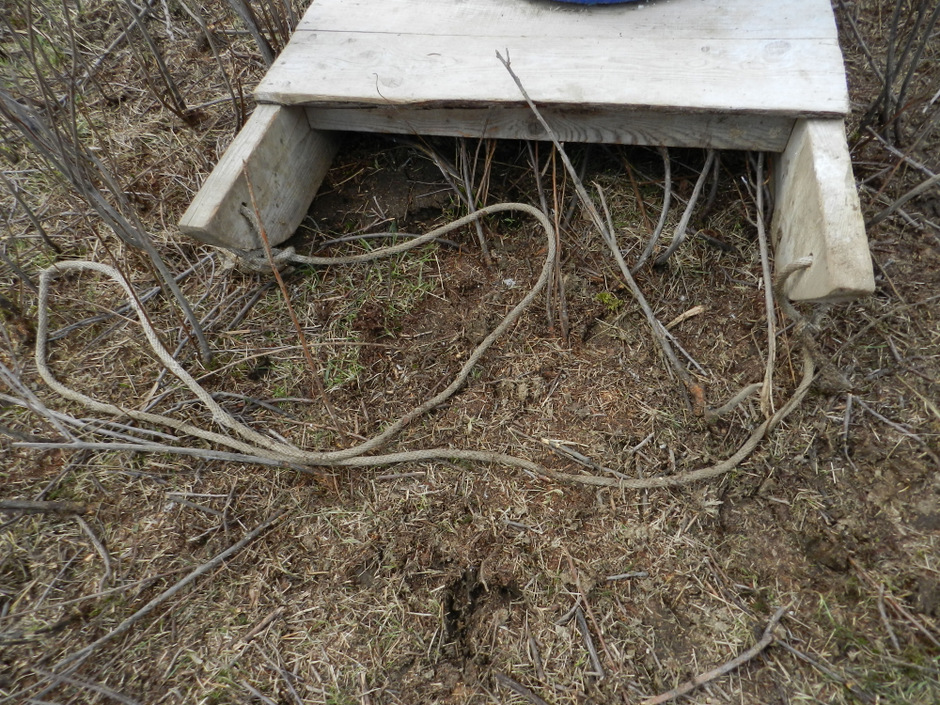
The base of the barrel is attached by screws onto the wooden sled
The bottom of the barrel is mounted to a wooden sled-type structure with screws.
To make the mineral container portable, we simply drilled two holes into each side of the wooden base and attached a sturdy length of rope (see picture below).
Wooden sled base with length of rope attached for quick and easy transport
When moving our mineral container, we simply take hold of the rope and pull it ourselves or hook it to our four-wheeler and move it where we need it to go.
In terms of how much mineral to feed out, the industry standard is 2-3 oz/head/day of trace mineral. For our herd of 20 cows, we feed at least 40 oz of mineral a day. That amount increases during times when our cows require extra nutrition such as during the breeding season, when our cows are currently nursing AND need to bred-back.
Observe your Herd
When designing and implementing a mineral program it is just as important to physically watch for and note if any change – good or bad – is occurring in your herd.
Are you noticing increased body condition in your cows?
Are those coats getting a little less dull and a little more shiny?
Have your infertility problems disappeared?
Did you get through calving season with 100% of your calf crop?
Perhaps the most important tool in the cattle management toolbox costs you nothing but time. It involves simply observing your herd. Us cattle farmers invest a lot into our animals and our operations – financially, physically and emotionally. Taking the time to slow down, open our eyes and simply watch our animals for issues is our job. This is all part of practicing good animal husbandry.
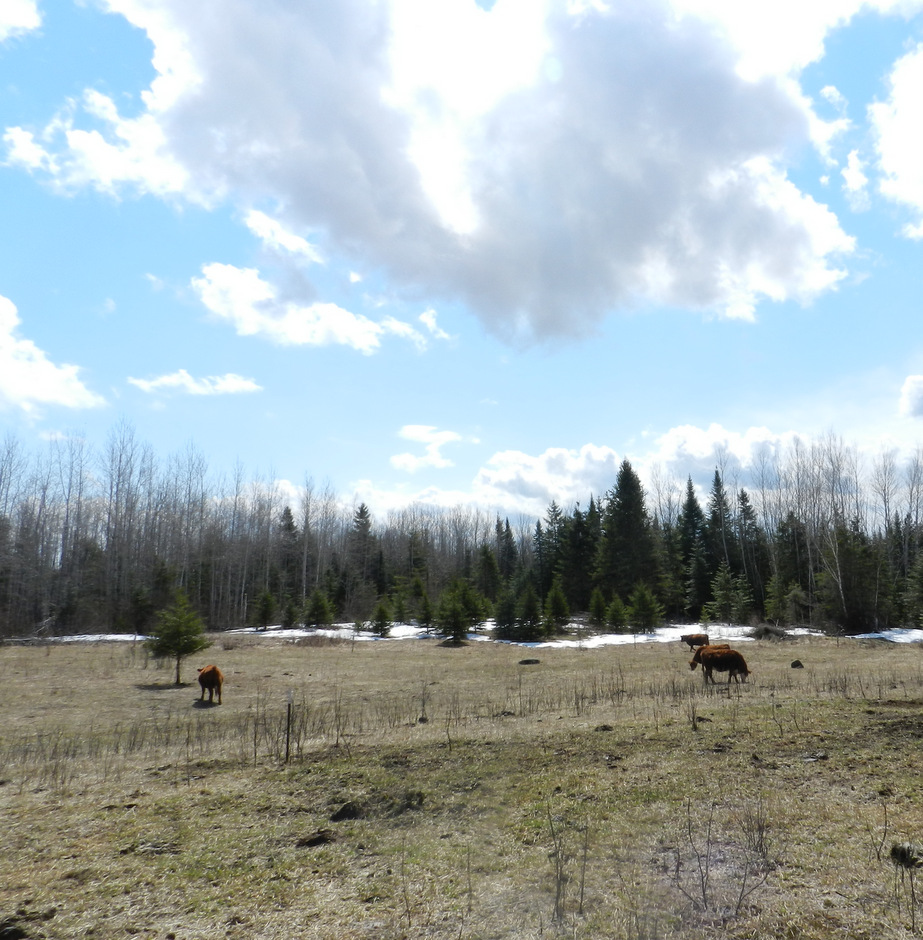
Sunny afternoon in late-April on the farm.
It is amazing how many problems or issues can be identified or even prevented when we take the time to watch.
It’s devastating. A long, hard winter finally eases its grip, the snow begins to melt, and you find a dead calf on the ground. With today’s calf prices and production costs, the financial aspect of a dead calf is a tough enough pill to swallow, but when added to the emotional toll, the abortion issue is not an enjoyable topic.
We just found our first dead calf on the ground and I’m asking questions and looking for answers to a problem I’d never spent much time thinking about. According to industry standards, you can expect a 1-2% abortion rate in the cow herd as run-of-the-mill. Beyond that, though, it’s time to start looking for a problem.
Late term abortion in beef cattle can happen for two reasons: 1) infectious agents, and 2) environmental conditions.
Infectious Agents
The infectious agents responsible for abortions in beef cattle include Bovine Virus Diarrhea (BVD), Infectious Bovine Rhinotracheitis (IBR,rednose), Leptospirosis, Neospora, Brucellocis and a number of others.
Environmental Conditions
Non-infectious causes for cattle abortions are common. These include nutritional deficiencies, particularly low protein in the diet, and mineral deficiencies, commonly attributed to low selenium or other vitamins and minerals. In some cases, even the best of management of most aspects of the herd cannot prevent abortion. It can take place as a result of low water availability for a short period of time, falling on the ice, or even being head-butted in the belly by another cow.
Abortions in beef cattle are an economic and emotional problem on the farm. I hope we don’t see another one of these for a very long time, and if we’re doing things right, hopefully we won’t. Each time we encounter a problem like this one is an opportunity for learning and improving things we may be lacking in our cattle herd management. The links below provide more information on late term abortion, its causes and possible prevention.