Author: Sara Wood

  • Cattle Breeding: Selecting Your Bull(s)

    043
    Yearling black Angus bull and red Angus heifers
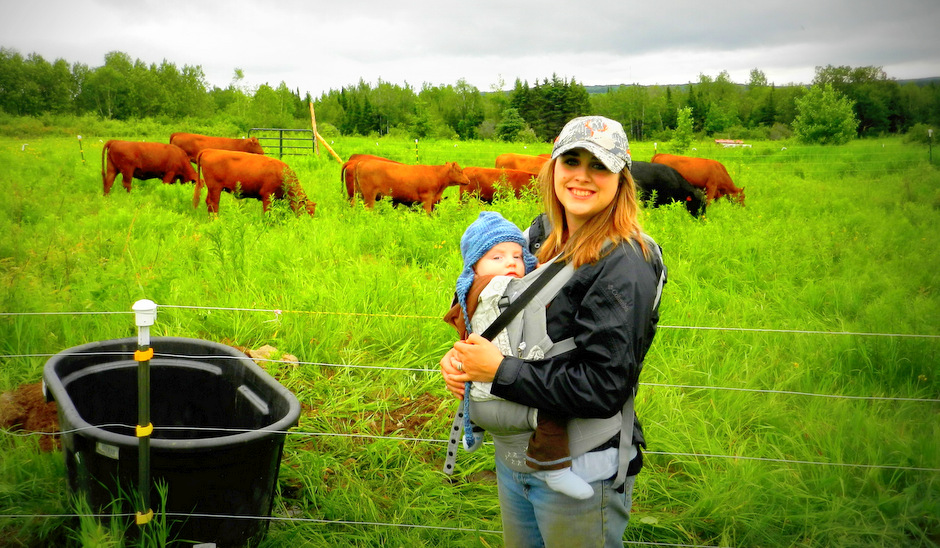
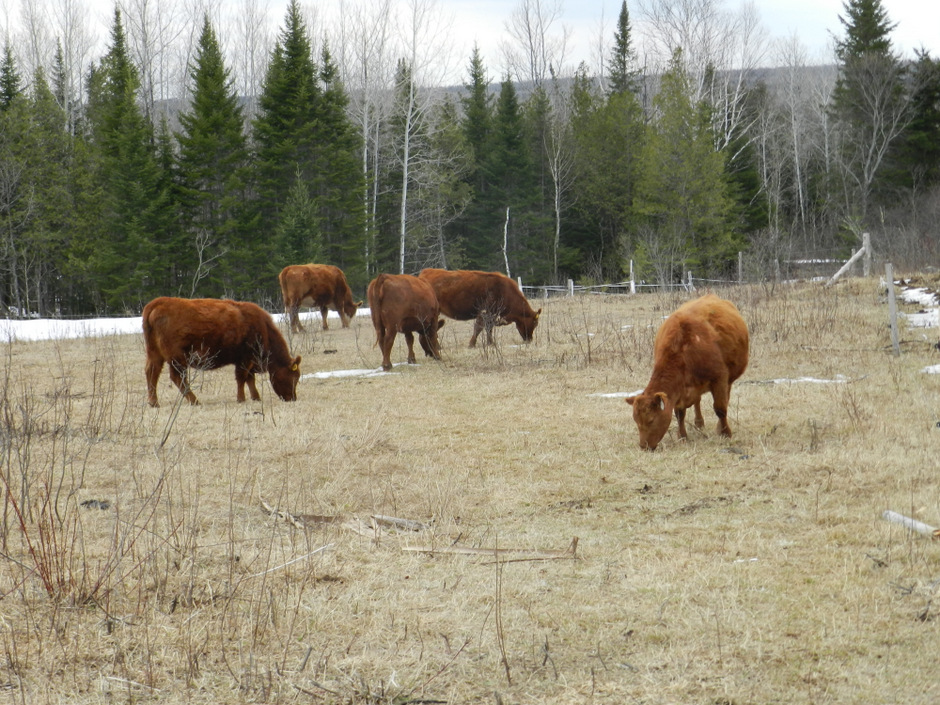
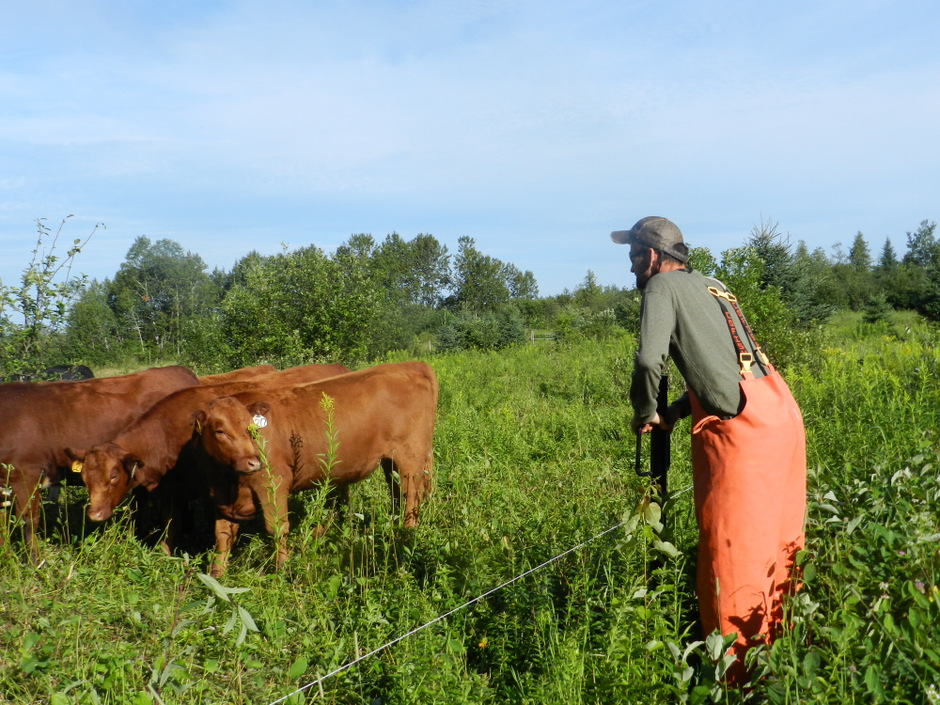
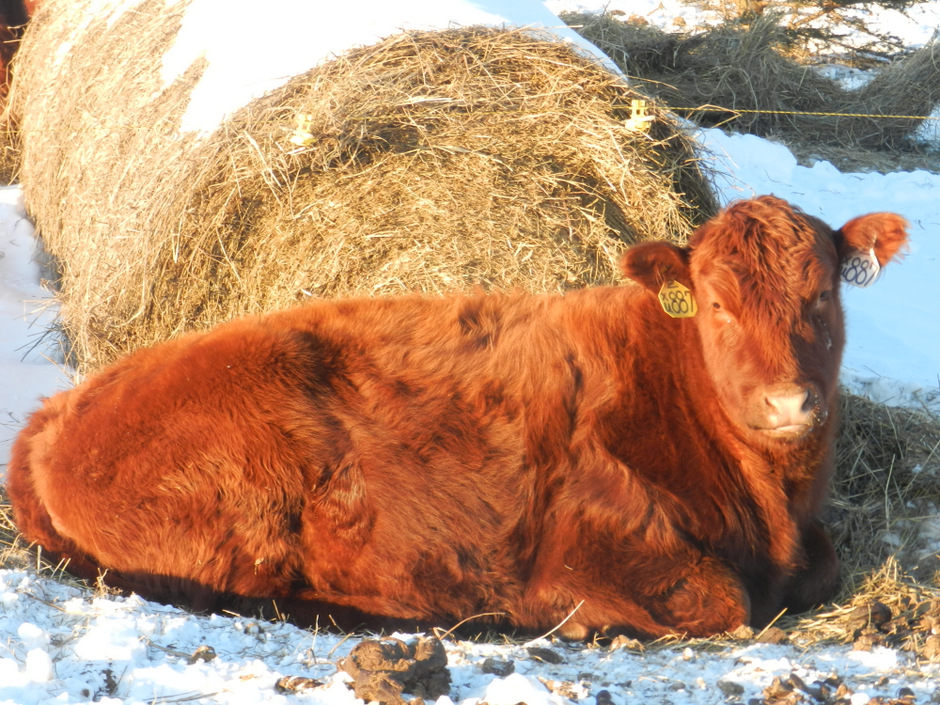
    during the summer breeding season on our property.

    Our post today focuses on selecting a bull or bulls for your breeding program.

    Please click here to read our previous post on deciding your breeding season.

    Please click here to read our introductory post for our Cattle Breeding blog series.

    We had written this post BEFORE our calving season started.  With four calves on the ground, we feel that we need to add a few caveats.  In fact, we have written another post, partner to this one, adding information and “words of wisdom” in selecting a bull.  Please click here to read that post.

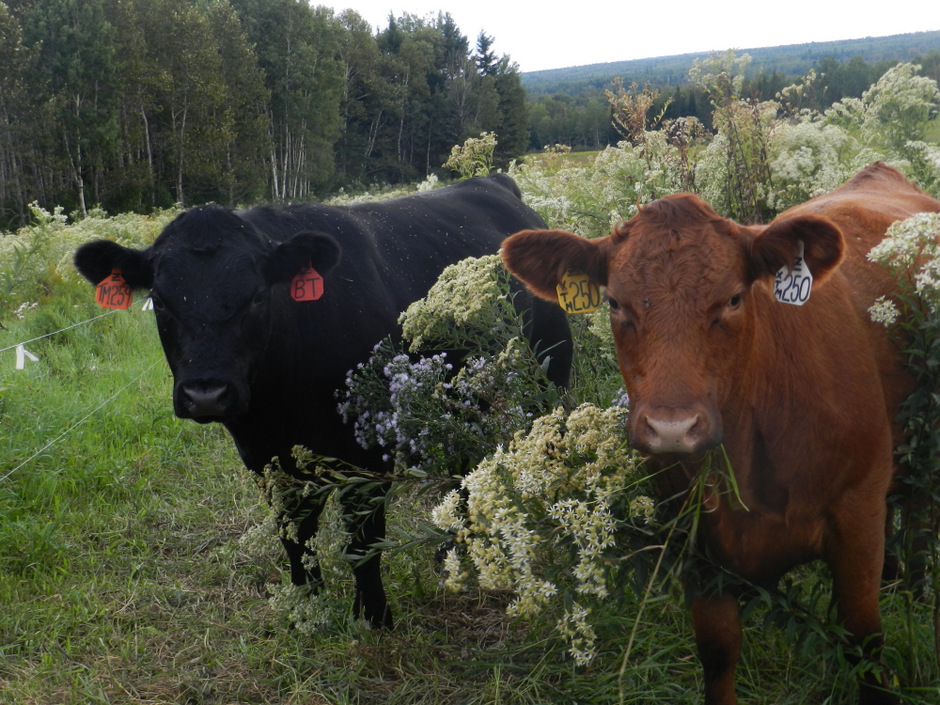
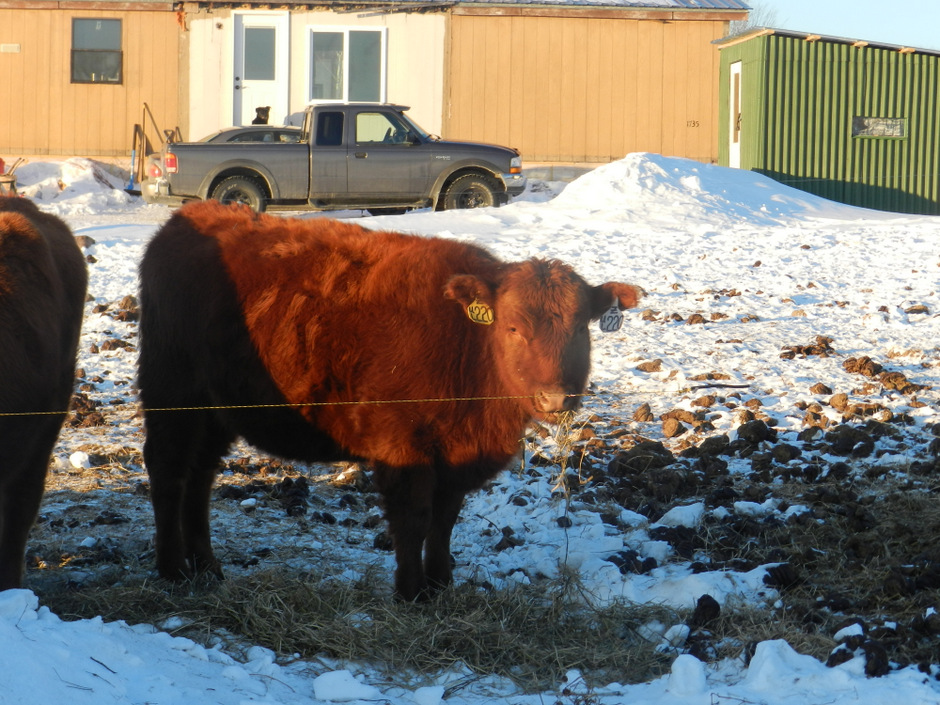
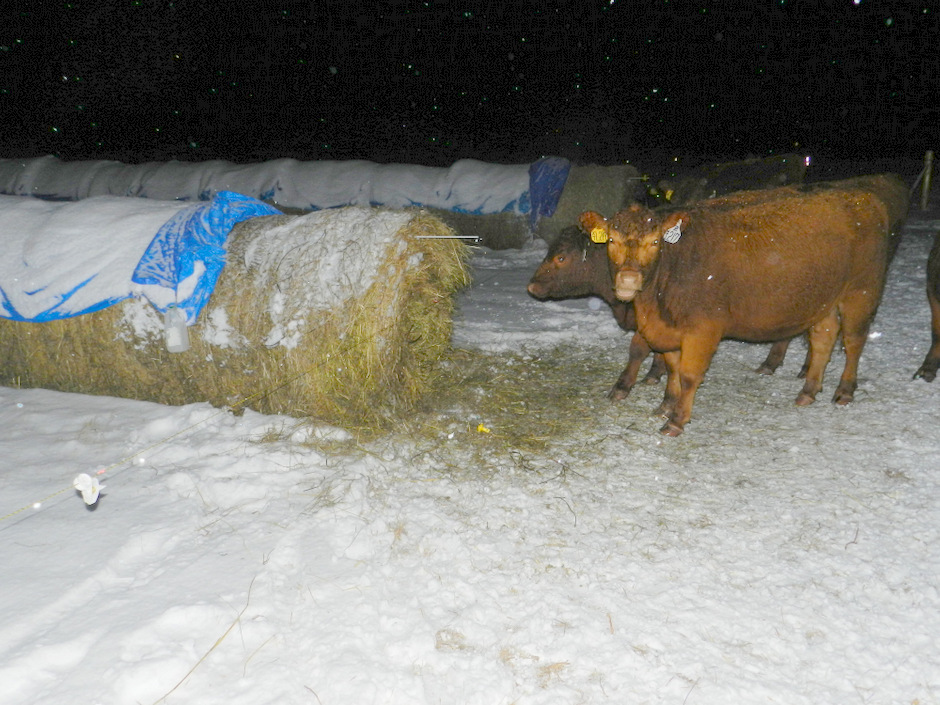
    Bull selection is one of the most important elements to having a successful cow-calf operation.  Having the right genetics that match well with your environment is critical to your herd’s performance.  Because calves will get half of their genetic material from the bull and a single bull can breed many cows, choosing the right bull has the greatest single influence in improving the genetics of a herd.  You need to carefully consider the goals of your breeding program and your operation as a whole and what traits and genetics you are looking to add to your herd.

    Some questions you should consider in selecting a bull are:

    Will you be using a bull from within your own herd or will you be leasing a bull?

    • Using your own bull is ideal as you are familiar with his genetic and heath history.   In addition, your bull should be comfortable and familiar with your property and with you. Furthermore, you do not have to contend with a lease contract, a breeding fee and the dynamics of transporting the bull.  However, bulls typically must be purchased from a seedstock operation or another farm to avoid genetic problems due to inbreeding.

    Leasing a bull is a great option for those without the financial means, facilities and/or the desire to have their own bull.   Here are some things to consider:

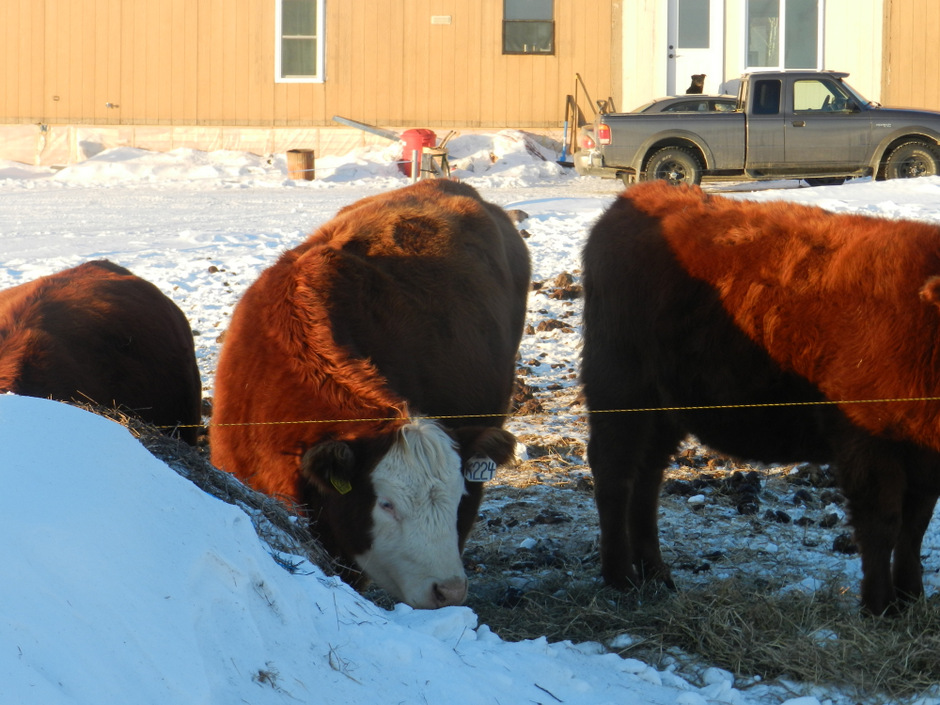
    • When leasing a bull, you need to consider the health of the bull and of the herd that he is coming from.  You do not want your leased bull to introduce a disease to your herd.  You want him to be in the best physical shape possible, with current vaccinations.  Ask to see his pedigree and his health records.  Ask to see any and all records on him. Ask about his breeding success and the condition and performance of his offspring.  Conformation is important to consider in selecting your bull.  Your bull should be well-muscled (too much can be a negative, though) with a deep chest and short, muscular neck.  He should have a good coat (indication of good diet) and alert eyes.  He should be docile and quiet and allow you to get close to him and walk around him.
    • Pay close attention to the condition of the other animals on the farm and of the cleanliness of the farm as a whole.  If the farm has sickly animals and has unsanitary and/or unsafe facilities and pasture conditions, you need to think twice about leasing a bull from them –  even if the price is a good deal.  This is not the time to ‘save’ money.  You know the saying “You get what you pay for”?  Remember that when deciding on a bull to lease.
    • Have a written lease contract with all conditions and restrictions clearly outlined, including all fees.

    What type of calves work best in your operation?

    Are you looking for a bull that throws large calves?

    • With a larger calf, you have the opportunity for more gain, a higher weaning weight and a larger paycheck in the Fall when you sell the calves as feeders.
    • A larger calf may be able to handle weather-related and other stress better than a smaller calf.
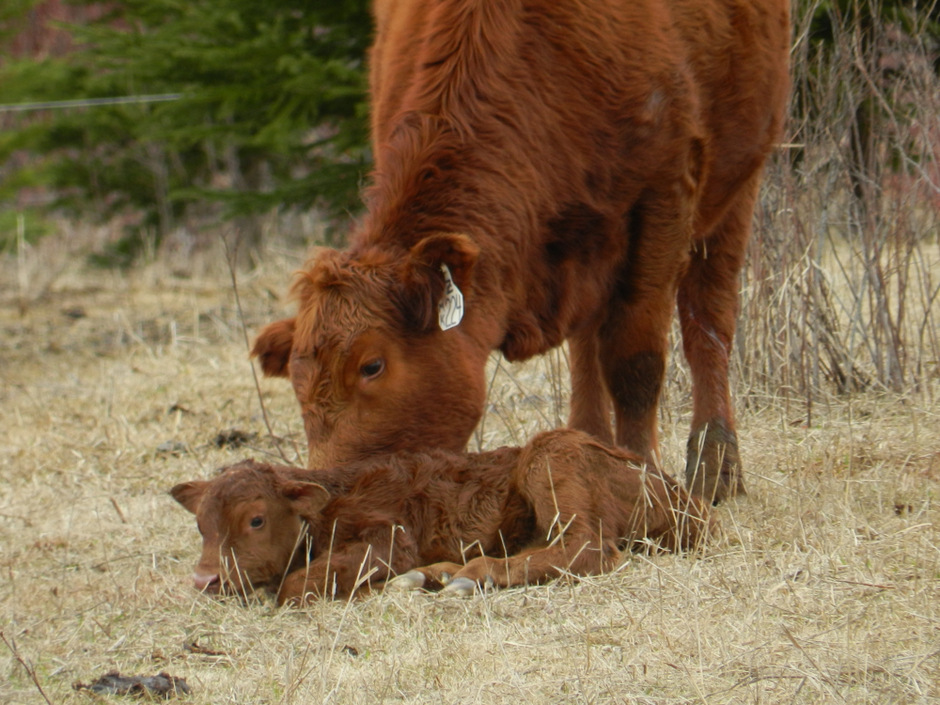
    • A larger calf, though, can make labor and delivery more difficult on the cow, especially if you have a small-framed cow and/or a first-calf heifer.  You may have to provide a lot of assistance to the mother cow during delivery.
    • Do you have the facilities, equipment and the know-how to assist in pulling calves?
    • Do you work on the farm full-time or do you have a job that takes you away from the farm during the calving season?

    Are you looking for more compact, smaller-framed calves?

    • Labor and delivery, especially for a first-calf heifer, may be easier with a smaller calf.  Nothing is guaranteed, though.
    • Possibly less or no assistance needed at delivery with pulling calves.
    • Advantageous if you have a full-time job away from the farm and/or do not have good facilities for calving (e.g., barn with a stall to restrain mother cow while you pull the calf).
    • Smaller calves will obviously have lower birth weights and you need to consider such impacts on weaning weight and average daily gains if you sell these calves as feeders and also, yearling weights if you are using these calves as replacement heifers or adding to your herd.

    Are you breeding heifers?

    • When breeding heifers you especially need to consider the size and age of the bull and the type of calves he produces.
    • You may want to consider a calving ease bull for your first-calf heifers.
    • Putting a mature, low-calving ease bull on a first-calf heifer may produce a very hard and difficult calving for that heifer and leave that animal in poor physical condition.  The stress of a difficult delivery could affect the rate and degree of bonding with the calf, milk production and the success of being bred-back.

    The Angus Organization provides an excellent description of heifer calving ease EPD’s (expected progeny differences).

    Calving ease. Heifer calving ease EPDs were calculated using a multi-trait animal model including birth weight and calving score data. The result is a heifer calving ease direct and heifer calving ease maternal EPD, as defined below.

    • Calving Ease Direct (CED): Calving Ease Direct EPD is expressed as percentage of unassisted births, with a higher value indicating greater calving ease in first-calf heifers. It predicts the average difference in ease with which a sire’s calves will be born when he is bred to first-calf heifers.

    • Calving Ease Maternal (CEM): Calving Ease Maternal EPD is expressed in percentage unassisted births with a higher value indicating greater calving ease in first-calf daughters. It predicts the average ease with which a sire’s daughters will calve as first calf heifers when compared to daughters of other sires.

    Are you breeding cows?

    • While CED is intended to be considered in breeding first-calf heifers, some of the top Angus breeding programs, such as Beckton Stock Farm in Sheridan, WY encourage using their calving ease bulls on your cows as well.  They explain that calves from these cows can provide a good source for replacement heifers in your herd.
    • Using a non-calving ease bull may also be appropriate for breeding your cows.  A mature cow has had more experience in calving and in maternal care-taking than a first-calf heifer.  As such, she may be better equipped to deliver a calf not sired by a calving ease bull.

    Calving Ease and Gestation Length

    The ideal bull in the cow-calf operation is one who throws small calves that have high weaning weights in the fall.  The advantage of having both calving ease and high pay weights is an attractive one, and can often be achieved by using short-gestation bulls.

    • The standard gestation length of a cow is around 283 days.
    • The fastest period of calf growth in the womb is during the last days of pregnancy (often around 1 pound per day, or more)
    • By being born several days earlier, a calf with fast growth potential can be born at a lighter weight, making for easy calving, and still achieve a high weaning weight in the fall.
    • Short Gestation Length (SGL) bulls produce smaller calves that will still reach maturity at a large size.  Therefore, calves from these bulls should not be kept as replacement heifers with a smaller mature size in mind.  Your cows may have low birth weights, but they’ll still be large at matureity.
    • That said, you can have a short-gestational bull that is ALSO a calving ease bull.  Our friend and mentor has had great success in using these SGL, calving ease bulls and does use some of these calves as replacement heifers and/or additional heifers to his herd.
    • Even more time and thought needs to go into planning your breeding season when using SGL bulls, though.

    Using a SGL bull can be advantageous for your heifers and cows. 

    • An earlier birth allows the mother more time to start cycling again and to build back her body condition for being bred back.

    Feed Efficiency/Forage Convertibility:

    Economically viable characteristics in a cattle herd include the ability to maintain weight on low quality forage.  In fact, beef cattle were originally developed to take advantage of lower quality forage that wasn’t fit for dairy cattle, sheep and other livestock.  Producers should look for a bull that can maintain his weight or even gain weight on a grass-only/roughage diet EVEN when that grass and roughage is of a lower quality.

    Easy-keeper/easy fleshing:  A bull that can convert forage efficiently is considered an easy-keeper, or easy-doer.  This trait is often described as fleshing ability.  The ability of a bull to maintain his weight on a grass-only or roughage diet is desirable, but is often related to smaller mature frame, which can sometimes impact market demand for your cattle.

    Many bulls are growth-tested on a high octane ration that isn’t a realistic situation on the average cattle farm.  These bulls may gain lots of weight in the feedlot, but turned out to pasture they can fall apart.  If a bull loses weight or cannot maintain his weight on a grass-only/roughage diet he is considered a hard-doer and will cost producers more in feed.  Tread cautiously in leasing a bull that is a hard-doer.  Do you want to bred that into your herd?  If your operation is grass-only/roughage, you may struggle with daily gains and weaning weights in feeder calves from sires that are hard-doers.

    There are many factors to consider when developing your breeding program and quite frankly, for newbies like us, it can be a tad bit overwhelming.  We are learning every day, as we consider the genetics we want bred into our herd and how to develop a breeding program that meets the goals and needs for the growth of our operation and performance of our animals.

    Two sets of genetics go into making a calf and therefore, much thought and genetic consideration needs to be taken into account when deciding what bull to breed to which heifer or cow.

    Speaking from personal experience acquired in just these past few weeks, a calving ease bull or a bull with calving ease genetics does not 100% guarantee a small calf and/or an easy birth.        Please click here to read more about our experience.

  • Deciding Your Breeding Season

    031
    Breeding season on our property last summer
    with a yearling black Angus bull.

    We are starting off our Cattle Breeding blog series with a discussion on deciding your breeding season.

    Please click here to see our introductory post to our Cattle Breeding series.

    Developing a successful breeding program takes many years and careful thought and consideration into the genetics you want in your herd.


    Deciding the timeline for your breeding season is an important step for every breeder and one that needs to be given a lot of careful consideration.

    189
    Our second calf. A red Angus bull calf.
    Born on April 28, 2014


    Here on our farm, we are in the midst of our very first calving season, with 4 of our expected 10 calves born.

    We are anxiously awaiting the births of the rest of our calf crop.


    276-001
    June 28, 2014 – The day our first herd of red Angus heifers arrived.


    Last spring, we were anxiously awaiting the arrival of our first herd of beef cattle -10 red Angus heifers.  We still had a month or so to go before they arrived but we already had cattle on the mind.


    We needed to decide when we wanted our breeding season to start.  We pored over pictures we had taken in the past month, looking for that transition from winter to spring, snow to green grass.  We needed to decide when our breeding season would start and for how long it would last.

    254
    New grass sprouting on May 3, 2013.
    One of the pictures we looked at when deciding when we wanted calving to start.

    After considering the weather and analyzing our pictures, we decided we wanted our calving season to start in late-April/early-May of the following spring.  We planned on the snow essentially being gone, and the grass starting to green-up at this time.  This put us at starting our breeding season in mid-July, for a 60-day breeding season.   We felt it was important to have a definitive start and end date to our breeding season, as to give us the most accurate prediction of when calving would start.  Perhaps more importantly, having all calves born in a tight window of time makes for a more uniform and saleable calf crop.


    By not knowing when your actual breeding season is, you leave yourself open to a lot of surprises and very little clue as to when or even if, your animals will calve.  For some farmers, they have an open-breeding season, where the bulls have access to the heifers and cows year-round. Others restrict access of the bulls to a certain window of time, such as a 30 or 60-day period.

    It can be tricky to complete natural breeding in only 30 days, but certainly not impossible for the seasoned breeder.  After years of developing a solid and consistent breeding program, with superior genetics, these breeders continue to have high pregnancy rates and a large crop of healthy calves on the ground each year.

    For the beginning farmer and breeder, though, a 30-day breeding season may not be realistic.  It certainly was not for us.  For example, if you are breeding a yearling bull(s) to heifers, they may need a few cycles to successfully breed.  Heifers and cows are in estrus or standing heat (open to being bred) on average every 21 days.   There is a short window of time for the bull to act once the cow comes into heat (typically 12-18 hours), though.  Therefore, your first-time bull may not get the job done the first time or even if the females appears to have been bred, the pregnancy may not take or be viable.

    Perhaps a 60-day breeding season may be more appropriate for your program.  During the span of a 60-day breeding season, you animals should cycle two, if not three, times.

    Some questions to ask yourself when deciding the time-frame for your breeding season.

    When do you want your calves to start dropping? 

    • You need to consider the weather conditions and the scope of your farm.
    • Do you have the facilities to accommodate calving during a snowstorm, in the middle of winter, with -30 temperatures?  Even the most seasoned and equipped farmer can lose calves in these conditions.
    • Consider the typical weather and ground conditions for the time of year you want to calve.  You might still be calving in a snowstorm (our first calf) even though spring has supposedly arrived


    Consider the pros and cons to early-versus-late calving

    Advantages to Early Spring Calving

    • Calves have more days for growth and weight gain
    • Higher weaning weight for your feeder calves
    • Higher yearling weight for your replacement heifers and/or additional heifers.

    Disadvantages/Challenges with Early Spring Calving

    • Need the proper equipment and facilities to accommodate early calving, especially during inclement weather
    • More calves lost due to cold winter conditions, crowded facilities and muddy yards
    • Higher feed cost to keep cows in adequate physical condition to have healthy calves and breed back on time.


    Advantages to Late Spring / Summer Calving

    • Warm weather and green grass are great for calf health and survival
    • Barns, shelters and other facilities less necessary
    • Lower feed cost due to availability of green grass
    • Better breed-back rates closer to summer solstice


    Disadvantages/Challenges with Late-Calving

    • Shorter period of time for growth and weight gain (smaller calves in the fall)


    How long of a breeding season do you want?

    • 30 and 60-days are common breeding season lengths.  Some breeders may extend to 90-days or simply keep the bull with the herd year-round.


  • Cattle Breeding Series – An Introduction

    256
    Pregnant heifers


    As I am typing this post, I can see 10 very pregnant red Angus heifers, munching on hay and resting in the springtime sun.  It is a beautiful sight.  Winter has been long and hard on these girls (and us, too!).  But, we are finally seeing the light at the end of the tunnel.


    Temperatures have been climbing into the 40’s and 50’s this week and for us, that is a heat wave.  Bring out the sandals and shorts!

    We have been sighing a collective breath of relief for our heifers.  We feared they would be calving in the midst of a raging snowstorm, with temperatures well below zero.  Our fellow beef cattle farmer and mentor has been doing just that the last month.  Luckily, he has the facilities and know-how to accommodate such conditions.  Here on our farm, we are just starting out and we don’t have quite the same facilities yet.  So, because of that, we tried to plan out our calving season for nicer weather.  Easier said than done, right?

    Our next series of posts will focus on different aspects of Cattle Breeding including deciding when your breeding season will be and factors to consider in selecting a bull or bulls for your breeding program.

    272
    Pregnant heifer bagging up


    As of right now, many of our heifers are bagging up nicely and could drop a calf at any time.

    We are playing the waiting game!

    195
    Heifer bagging up


  • Winter Hay Bale Grazing: Part 4 of 4

    086We round out our blog series on winter hay bale grazing with lessons learned and thoughts for next winter.

    See the links below for earlier parts in the series:

    Winter Hay Bale Grazing Part 1 of 4

    Winter Hay Bale Grazing Part 2 of 4

    Winter Hay Bale Grazing Part 3 of 4

    Lessons Learned

    This was our first winter implementing hay bale grazing.  We were pleasantly surprised at how well our animal’s adapted to this innovative form of winter feeding.   We worked for our animals and they worked for us.  We did not escape this experiment without making a few mistakes, though.  Below, you will find a list of some lessons we learned as well as our ideas and thoughts for our next season of winter hay bale grazing.

    1. Where did the fence/wire go?!
    070
    Wire and posts buried in the snow.

    We made our fences 3 feet tall in anticipation of the snowfall expected for a northern Maine winter.  We were hit with a hard winter, though, with snowfall doubling what we expected.

    Consequently, we have spent a lot of time digging fences and wire out of the snow.  Luckily, our cows have been relatively well-behaved and have not capitalized too much on our beginner’s mistake.


    Next year, we will modify our fences and raise them another foot or so.  Deciding how tall to make your fences will depend on what kind of winter conditions are typical for your area.  Once you have decided what height to make your fences, we recommend that you up that height another foot or so.  Just to be safe!

    2. Get out of there, cow!

    There have been a few times that we have looked out our window or have been walking towards the hay bales and noticed that something looked a bit off.  We look a little closer and sure enough, a cow has found herself inside the fence around the hay bale row and she is greedily munching away on a brand new hay bale – all to her herself.


    014
    Note the placement of the wire.
    Any lower and that cow will be stepping right over.

    The mistake here was a simple one but we didn’t realize the potential for it until it actually happened:  don’t place the poly wire too low on the hay bale OR too high!  This concern, though, became obsolete as we delved deeper into winter and the snowfall and ice accumulation prevented such an escape.  For those beginning months of winter, though, we learned that we needed to be very careful of wire placement as to prevent a cow from stepping over it.


    3.  Do You Trust Us?

    This probably falls more into the category of advice and tips but could easily turn into a  lesson learned.  To make winter hay-bale grazing work, you have to develop some level of trust with your herd.  To provide some quick background, we purchased our first herd of beef cattle – 10 red angus heifers – in late-June of 2013.  From the day they arrived at our farm, we make it a top priority to integrate ourselves within the herd in hopes of gaining a bit of their trust.  We went about this in many ways.  Most simply, we would go into the pasture and walk around the animals, talking softly and observing their behavior.  We started to see the herd dynamic and the individual personalities of each animal.  A herd leader became quite obvious from early on.  We observed a definite pecking order.  In return, the animals got very used to our presence.

    209
    Working on fence.

    They were starting to get more comfortable around us.  They got used to us talking to them.  They got used to us working on fences, water troughs, water pipelines and so on in their pasture.  They started to anticipate their daily ration of mineral.    After much work and repetition, we got the herd to follow us as we rotated them through pastures every 2-3 days. They were learning to trust us.


    For our effort and time during that summer and fall, we are rewarded daily with our winter hay-bale grazing.   When the time comes to switch to a new hay-bale grazing location, they follow us.  They stand back and patiently watch us while we adjust wires, shovel snow, cut out hay, and remove tarps.

    473


    They don’t let us give them body massages (well, one of them does) but they have come a long ways from their first day on the farm, where you couldn’t get within 10 feet of them and they were off and running.


    The trust building will continue this spring as our cows calve and into the summer as they are bred-back and rotated from pasture to pasture.   If you work with your herd a little bit each day and keep your patience and a good attitude, you will be amazed at the result.

    4.  How many hay bales have they eaten?!

    While we made every effort to keep track of the date that each hay bale was finished and the next one started, we did start to lose ground when we transitioned to our 2nd hay bale grazing location.    The level of snow and ice – on top and surrounding our hay bale rows – was massive and we started to have trouble recognizing the end of one bale and the start of another.   The reason why we wanted to keep track of each hay bale was so we could calculate and monitor the pounds of hay eaten per day/per animal.  We were able to keep up with the count in our 1st grazing location, and we got a really good idea of the lbs/day/animal of hay consumed.

    In order to calculate the consumption rate during the entire winter, we have a few ideas for improving our ability to count bales for next winter.  One idea is for us to mark the beginning of each hay bale with a distinctive marker, prior to snowfall.  One idea we have thrown around is to attach a length of fluorescent pink or orange flagging tape to the top, center of each bale.  We could do this at the same time we are attaching our tarps.

    5.  Orientation of hay bales

    Be sure to study your land before choosing locations to place your bales.  One of our bale locations was a place where snow tends to accumulate in deep drifts…..but we didn’t know that until this winter.  Next year we’ll avoid this spot for late winter bale grazing.  Also pay attention to the way the bales are oriented with the prevailing wind.  Our bale stacks that were oriented parallel to the northwest wind tended to have snow blown clear around them and made for easier grazing.

    083This concludes our blog series on Winter Hay Bale Grazing.  We hope that this series proves useful to you as you weigh your options for feeding your cattle next winter.  This was our first winter with hay bale grazing, and we do plan to implement this form of feeding next winter as well.  We have found this form of winter feeding to be cost-effective and extremely manageable for the scope of our operation.


    With one season under our belt, we will be approaching next winter better equipped and a bit more knowledgeable on what we want to do and what we do not want to do.  Surprises always abound, though, when working with livestock!

    So, we tell ourselves to: Keep your patience.  Stay creative and innovative.  Improvise when needed.  Stay calm.  Respect your animals.  And, most importantly, have fun!!

    We always love to hear feedback and suggestions on new, innovative techniques and methods in the beef cattle industry.

    Thank you for joining us.

    We will leave you with a few more pictures to enjoy!

    092081 085 093 094 091

  • Winter Hay Bale Grazing: Part 3 of 4

    019


    This is the third in a four part series we put together based on our first winter of bale grazing.  In today’s post, we outline supplies needed for hay bale grazing.

    Click here to read Hay Bale Grazing Part 1.

    Click here to read Hay Bale Grazing Part 2.


    Recommended List of Supplies for Hay Bale Grazing

    • Round hay bales – The amount and quality of hay bales you need will depend on many factors such as herd size, animal age, length of feeding period and nutritional requirements for your herd.
    • Tractor – You will need a way to unload and set-up your hay bales.   See if you can borrow a tractor from a fellow farmer or if a family member or friend that has as a tractor, see if they will let you borrow it.209
    • Hay bale spike
      1. The tractor you use may already have a hay bale spike but if not, you can buy one relatively cheap.  We purchased ours for $200 and we will reuse it each year with unloading and setting up hay bales.

      201

    • Polywire
    • 12 ½ – 14-gauge smooth, high-tensile electric fence wire
    • Electric fence energizer or existing electrified wire/fence to tie into
    • Metal t-posts

    017

    • T-post insulators
    • Rod post insulators – We like to use yellow, screw-tight rod post insulators.   If the insulator comes off the rod, the yellow color stands out in the snow.
    1. 121
      Yellow screw-tight, rod post insulator
    • Polywire in-line tensioners
    Polywire in-line tensioner
    • Handles to attach polywire to high tensile electric fence wire.  We used gate handles that were available and also made makeshift handles out of scrap wire.123
    • Shovel for removing snow
    • Axe for cutting out frozen and/or moldy hay
    • Leatherman, knife or scissors for cutting bale string and frozen tarps
    • Tarps

    264

    • String and/or twine
    • Empty milk jugs or containers with a similar type handle.
      032
      Note the the hay bale row in the foreground, with the blue tarp and plastic milk jug attached.


    • Graphing paper and pencil
    • Notebook for taking notes in the field
    • Computer with spreadsheet software

    We hope this supply list is useful.  Feel free to experiment with whatever materials work in your hay bale grazing situation.  These materials work for us, but we’re always looking for other items that work best on our farm.

    Click here to read about our lessons learned in our final post for our winter hay bale grazing blog series.