Welcome to Part 2 of our blog series on Testing and Measuring the Quality of your Cattle’s Winter Hay. Please be sure to read Part 1 – Why should we care about hay quality?
Today’s post will focus on the methodology of collecting a forage sample, the tools/supplies needed, and where you can send your forage sample for analysis.
We live in Northern Maine and send our hay samples to Dairy One and their Forage Testing Laboratory, based in Ithaca, New York.

Their website is extremely user-friendly, and their instructions for collecting a forage sample are thorough and easy to understand. Further, they even provide forage analysis kits and other supplies to help with the sample collection process.
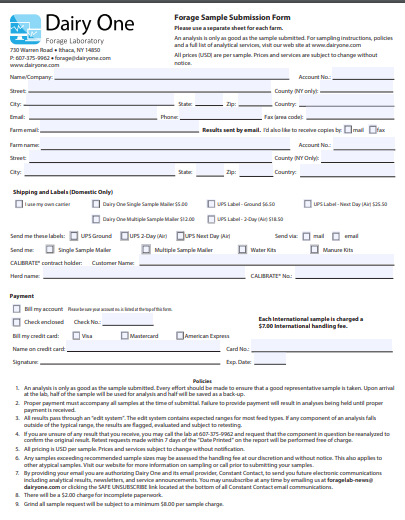
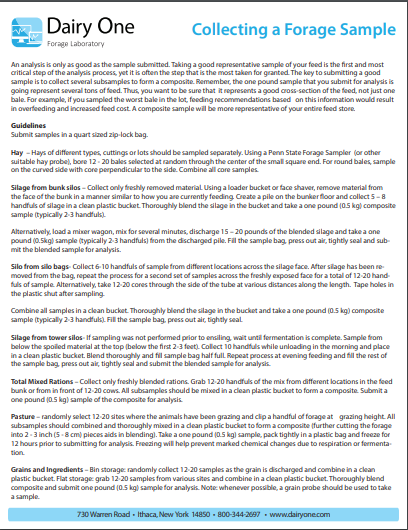
Their Forage Sample Submission Form is available online, as well as a step-by-step guide to Collecting a Forage Sample.
Forage samples need to be submitted in a quart-sized plastic bag within a Dairy One Forage Analysis Laboratory mailer envelope. For our purposes, we will be discussing the methodology of collecting a HAY sample. Please see the guide for Collecting a Forage Sample, for all other forage types.
Steps for Collecting a Hay Sample
Hay Probe Tool
If you don’t already own one, you will need to purchase a Hay Probe tool. This tool will allow you to bore (or make a hole), through each hay bale. Using a hay probe to collect a core sample will allow for the most accurate nutritional breakdown of each of your particular sample lots. Also, the hay probes on the market today are extremely user-friendly and can be used to collect many samples, both efficiently and effectively by a single person.
Determining Different Sample Lots (if applicable)

Be sure to determine your sample lots.
Let’s say you purchased hay from two different hay producers, and their hay bales are from two different cuttings, a month apart:
We have Producer A, with cuts from July and August, each from a separate field, and we have Producer B, also with cuts from July and August in two different fields. That gives us 4 LOTS to sample.
For the most representative and accurate analysis, the lab recommends that you sample 12-20 bales per lot, picked at random.
Collecting the Hay Samples
Supplies/Tools Needed:
Hay probe
Clean bucket to collect hay samples
Clean, quart-sized plastic zip lock bags
Permanent marker to label each bag with Lot Name (e.g., Producer A – July Hay)
Use your hay probe to bore into each bale in the appropriate location (see here for instructions for square and round bales). Empty the hay probe’s cleanout rod into your clean bucket, and then move to your next bale, adding each sample to the same bucket as you go along. After completing each lot, you should have 1 bucket with all of your samples. Mix the samples by hand in the bucket and fill your sample bag with approximately 1 pound of material (the lab recommends 2-3 good handfuls). Squeeze out as much air as possible and seal the bag. Repeat this entire process for each of your lots, being sure to keep your samples labeled.
Place each labeled, quart-sized plastic zip lock bag sample into your Dairy One Forage Analysis Laboratory mailer, along with a completed submission form and place in the mail. The lab will test your samples based on the type of forage testing you select. We always select the Forage NIR testing, which is $18.00/sample. This analysis provides us with Crude Protein and Total Digestible Nutrition, as well as a wide plethora of other nutritional information on a Dry Matter and an As-Is basis. Results will be sent to the email that you provide on the submission form. You can also receive copies by fax or mail.
Please see our final post in this series: PART 3: Receiving and Understanding your Forage Analysis Results
Also, if you missed Part 1, please check it out here: Part 1 – Why should we care about hay quality?
Thank you for reading!


Leave a Reply